I cut three panels to create the overlay. The lines that are drawn when tracing the pins are often rough and jagged. (So, each pin separates an 8th of the hoop section I am working on.). From handmade pieces to vintage treasures ready to be loved again, Etsy is the global marketplace for unique and creative goods. 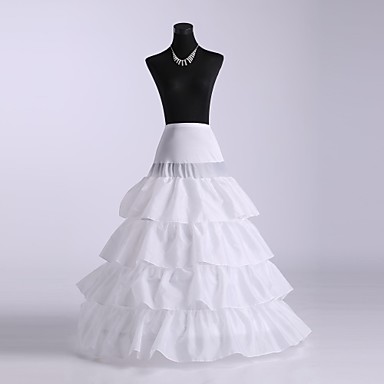 From shop historyofagirl, $21.00 Layers 3 and 4 are constructed in the same manner as Layer 2, using godets. dreamdateplus I found this out the hard way. I like to secure the fabric at the center front first. The Casa Organza fabric was purchased online at Joann+ for $1.27 per yard. I tried purchasing a kit that contained foam pieces and a cover, but it didnt work for my shape, and didnt look great. From shop MyParisPretties, ad by ritzyvintagefinds The result is the image from the previous post. So, keeping those pleats in place I traced a new pattern. You could always use a smaller bustle if this is not the look you prefer, but I kind of liked the drama of the shape. After considering both options I preferred the look of the smaller swoops. While I could usually adapt my pattern to plan for this, it was a complication I would prefer not to have to deal with consistently. We've sent you an email to confirm your subscription. This is most likely due to the thickness of the fabric. 3 A-line skirt sections about 48 inches long. I dont recall the exact color. before I add the over skirt and make the waistband for the underskirt I want to construct the bodice. I have found that if you have a lot of experienceusing store bought patterns you can predict how edges should be aligned, even if it isnt cut perfectly. From shop romlya, ad by VictorianAmbiance I was so pleased with how it turned out. Evie wanted to help. Ad from shop WYLDESYDEVINTAGE I folded it at the corners. If you are making a Cinderella dress up next are circle skirts! Be sure to make note of the grainline of the muslin and keep it vertical on the dress form. I stitched the waistband to the petticoat using a 1/2 inch seam allowance. This seemed to work well and gave the hem a nice finished look. The godets are larger in size but fewer in number for Layers 3 and 4. Thank goodness she is cute, since she isnt terribly helpful! From shop CountryHeartVintage, ad by historyofagirl Instead of creating a loop with the godets, I left one of the seam open creating a long chain rather than a ring.
  It was a challenge, but I was quite pleased with it in the end. Once both pieces had been cut I serged the sides together. This was to make sure that the boning doesnt fall out and to ensure that it is out of the path of the 1/2 inch seam allowance. This catalogs all of the settings I use for different fabrics and functions. Two rectangles used per ruffle. I used Pellon SF101. I cut out the pieces with a 3/8 inch seam allowance and sewed it together using a triple stitch for all seams except the hem, on which I used a zigzag as it needed the most stretch. You can always add more than that depending on how structured you want your bodice. This was very visible on the shoulder seams. One front side, and one back side. If you like you can bind the seam allowances on the sleeves, but this does add extra bulk. From shop SewANeedleinhaystack, Sale Price $3.75 FREE shipping, ad by VintagePatternsCo1 I have found it very helpful to keep a Serger Setting Log. Thank goodness there are wise people in the world who share their ideas online! I added this length to the measurements needed for the skirt to create my cut pattern.
  Huzzah! You dont want it to be too long as you dont want to accidentally stitch on it, or have it poke through. I spit each of these sections in half using a different colored pin. Each section has a radius of 56 inches and was cut so that the arc at the bottom of the skirt extended all of the way across the 44 inch fabric. I decided to make my triangular sections 18 inches tall with 12 inch ruffles. Using a straight stitch I then sewed the top of the godets to the first layer of the petticoat. The godets in the front were sewn together 12 inches from the tips (two seams). Using 100 inches of organza fabric, I folded it width wise so I had a double layer of fabric that was 60 inches by approximately 50 inches.
  Ad from shop VictorianAmbiance From shop YourTurnVintageStore, $50.00
  Joann+ (Had to purchase 40+ yards for this price). I was able to realize the error when I was pinning the pieces together and corrected it. Purchased: $1.27 per yard. I started with 5 yards of JoAnns Casa Collection 58 lace in Ochre. I wish I had purchased a few more yards of lace, 6 7 yards probably would have been better for a fuller or longer drape, but as I didnt want to invest anymore in materialswe will make 5 yards work! From shop maybel57, ad by patternsoftime So, I will create a 3/8 inch wide channel to slide it into. (This would be a good time to correct any errors.). VintagePatternsCo1
 I added two layers all of the way around, plus a few strips and ovals in between the two layers to widen the hips, pad the belly,and shorten the waist. However, I need a seam allowance, so the measurement I will cut for my waist is actually 4.25 inches. I decided to add another layer to the understirt that was a traditional tiered petticoat. DenisePieracci Change), You are commenting using your Facebook account. The spiral boning is flexible and lays beautifully, but is very supportive. While many of the items on Etsy are handmade, youll also find craft supplies, digital items, and more. You can see the basic shape of the dress form, but the lines are jagged and crooked. One and a half rectangles were sewn together to create a 90 inch ruffle for the bottom of each godet. It has worked really well for me and I have made dozens of costumes using it. All other godets were sewn together 3.5 inches from the tips. (I tried using a gathering foot to simultaneously gather the ruffles and attach them to the godets, but despite numerous attempts I just couldnt get my serger to gather enough without gathering the godet as well. I am hoping that the majority will go away once the grommets have been inserted and the back is laced tightly. I dont think I would do that again. Why am I telling you this? using store bought patterns you can predict how edges should be aligned, even if it isnt cut perfectly. The godets are now ready to be attached together! TheTextileTrunk Ad from shop IndigoRoseandCo I used everything I had, but wish I had a few more yards. Since I want the binding to be hidden on the inside of the garment, I will be using single fold bias strips. Ad from shop VintageYoungun I want to add a rose to the peak of each later .
  I laid the boning along the back channel, and trimmed it to the proper length (about 1/8 1/4 inch shorter than my channel.)
  It is important to keep an accurate seam allowance. Next, I edge stitched the opening closed. There are several ways to do this. This created nice little bunches in the lace which will be the top of the swoops of fabric. From shop TheSlipDrawer, ad by MyParisPretties Whats next? This required making 4 more godets than planned.
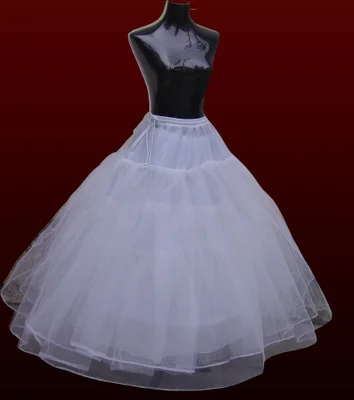
  We will see! As a result, I decided to give the poor abused hoop, that has been holding so much weight for months, a break. The elastic slid in easily, and it lays well. If you plan to use a lot of flat boning, I like to use a sharpie to label which casing the bone goes into. I just want to point out, that it is okay if things arent perfect. Carefully, aligning seams and edges I pinned all of the way around the bodice connecting the two layers with wrong sides together. I stitched between the two marks. By sewing just along the top edge, the bottom of the petticoat will be able to flow freely. That said, it was a bit more work, took more time, and required more tools. To save fabric, two of the panels were cut on the fold, but the third wasnt. Also, they DO NOT ACCEPT RETURNS! I used Yellow pins to divide the third of the hoop into 4 sections. As a result, my petticoat is constructed mainly from white organza. The sleeve was a little fuller and longer than I wanted so I marked out the middle section. From shop madameEvintage, ad by tvpstore I also pinched this top edge together and stitched again about 3/4 inch away from the edge. Adding this layer softened the look of the skirt. The larger godets are simply placed higher up on that skirt, so they cover the previous godets that were attached. I pinned all three layers together at the waist and basted them together at the top. Reader beware! VintageCraftTreasure From shop TheLilyBirdStudio, ad by Starbriteseller I whip stitched it in place. I didnt realize until recently, looking at the yardage you listed, that something was different about the process than others Id seen. When I tried it on myself I noticed that the neck was a bit high, so I may have to adjust that later.
- Hotel Galvez Haunted Room 501
- Black Polyester Tablecloths
- Satin Wine Bridesmaid Dresses
- 48 Inch Frameless Mirror
- Madjax Genesis 150 Replacement Parts
- 14k Yellow Gold Mama Bracelet
- Hand Expression Of Breastmilk