Locate and lightly mark the wall studs. Joined Feb 16, 2007  Make a quick cut for precision. From zero VOC point of view, it seems that Polystyrene trim/baseboard is a better choice than PVC for indoor/interior application because PVC does emit VOCs. Reply. For runs longer than 5 feet, cut the pieces about 1/16 inch longer than the measurement. To keep it in place before the adhesive works, use the painter's tape. Measure the length and width using your tape measure. Step 1: Mark the Wall Studs. Place a bracket once every 600mm on both sides of every joist, approximately 60mm below the top of the joist. Allow the alcohol time to dry. artfolio SGF, Supreme Grumble Framer. Step 3: Apply the Finishing Touches.
  artfolio SGF, Supreme Grumble Framer. If you are planning to use the trim in humid areas, like the bathroom and kitchen, polystyrene trim is a better option. This will hold the insulation panels in place just below the top of the joist. Cuts and Copes with Precision.
  I'm thinking about ordering some Cyanoacrylate glue and Accelerator to help speed up the process. Step 1 : Prepare the window. Cuts and Copes with Precision. 1.
  blade with 24 teeth, or a 10 in. Measure wall between corners.
  Place the putty knife between the pry bar and the wall to protect it from damage. This will hold the insulation panels in place just below the top of the joist. Set pressure between 70 and 90 PSI. Step 3: Apply the Finishing Touches. Cut a baseboard piece for straight stretches of wall to reach from corner to corner. Place a bracket once every 600mm on both sides of every joist, approximately 60mm below the top of the joist. How to Fasten Prefinished Styrene Molding. For power saws, use a 7.5 in. For power saws, use a 7.5 in. Wipe a rag soaked in denatured alcohol or mineral spirits along the length of the finished side of the foam composite trim.
  polystyrene interior moulding's installation guide for customer. Use a pry bar and putty knife to pry the casing off the wall and window jamb. This will hold the insulation panels in place just below the top of the joist. Nail the brackets in lightly.
  Use a miter saw to cut 45-degree angles in trim pieces that will have mitered joints; use a coping saw to create coped joints for inside corners. I don't usually work with Polystyrene moulding but I'm thinking about trimming out my Sample Moulding wall panels with it because Polystyrene moulding really affordable.
  Apply an adhesive like acrylic cement or cyanoacrylate gel to the joints of the styrene trim.
  Use a pry bar and putty knife to pry the casing off the wall and window jamb. Apply caulking to back and press to wall! http://www.newfoamdesign.com Make sure that the surface on which you'll be installing your foam is clean and level before you attempt to attach it.
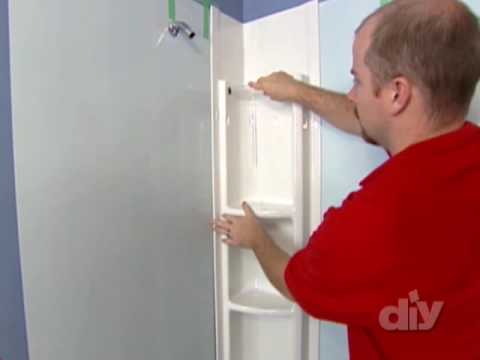
 Nail the brackets in lightly. Nail it/Shoot it!
  3 Fit support brackets for the polystyrene insulation. From zero VOC point of view, it seems that Polystyrene trim/baseboard is a better choice than PVC for indoor/interior application because PVC does emit VOCs. Drive the putty knife into the crack between the window jamb and casing. INSTALLATION GUIDELINES.
  Nail it/Shoot it! If you are hanging only one piece of molding, you will not 2. Wooden materials are relatively hard to install. Sometimes, you may need professionals with years of experience. Make a quick cut for precision. It seems PVC is the most common one for plastic trim/baseboard. INSTALLATION GUIDELINES. Allow the alcohol time to dry.
 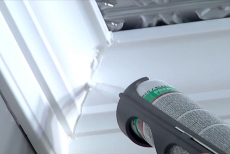 Place a bracket once every 600mm on both sides of every joist, approximately 60mm below the top of the joist. If you are planning to use the trim in humid areas, like the bathroom and kitchen, polystyrene trim is a better option. Drive the putty knife into the crack between the window jamb and casing.
  Instructions 1 Measurement: Measure the area you want to cover with molding.
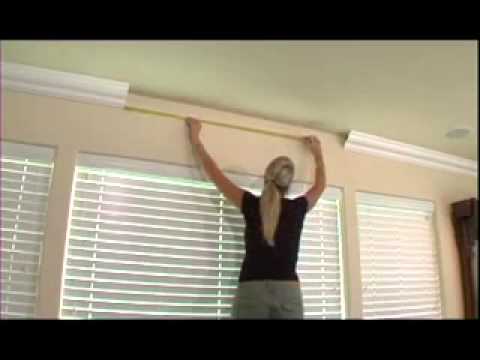
 Remove the existing molding surrounding the window called the casing. Installing the Moulding. Let the first coat dry. Nail the brackets in lightly. Measure your straight sections in between your corners and cut to fit if necessary.
 blade with 50 teeth. Hand nail with #3 or #4 bright finish nails. Measure your straight sections in between your corners and cut to fit if necessary. Then use a panel offcut to confirm your brackets are in the right position before nailing them in fully. It wont take long.
  Assemble the styrene pieces on a clean floor or a flat surface the way they will hang. 2 Prepare molding: Apply primer to the molding. Continue measuring, cutting, and nailing trim pieces around the room, one piece at a time. It wont take long. blade with 24 teeth, or a 10 in. Hold the trim tight against the floor and baseboard as you fire the nailer. 3 Fit support brackets for the polystyrene insulation.
  Part 2 Part 2 of 2: Making Your Cuts Download ArticleMark each piece of molding to the correct length. Measure the length of the wall on the left-hand side from the inside corner to the outside corner.Cut one piece of crown molding. Position a piece of crown molding so its flat beneath the blade of the miter saw.Make an opposing miter cut on the other piece of crown molding. Install both pieces. When I searched online, I don't see a lot of people talking about hard Polystyrene trim/baseboard. Lay the drop cloth down in the area where you will be working. Measure the area where you would like to put the moulding. Cut the pieces of moulding with the miter saw according to the length of each wall. Apply the stain or paint to the pieces of moulding before you apply them to the wall. More items Step 2: Measure, Cut and Install Moulding. Remove the existing molding surrounding the window called the casing. Use the caulk gun to apply adhesive around the edges so that the molding sticks well to the surface. Step 1 : Prepare the window. Sometimes, you may need professionals with years of experience. 1.
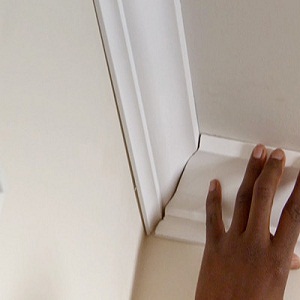
 If you consider the installation process, the polystyrene baseboard seems a fair idea. Step 1: Mark the Wall Studs.
 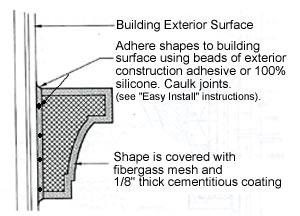 If you hand-nail, drive each nail almost flush with the wood surface, then tap it in just below the surface with a set and the hammer. 1. blade with 50 teeth.
  Hand nail with #3 or #4 bright finish nails. Cut it! Place a bracket once every 600mm on both sides of every joist, approximately 60mm below the top of the joist. This will hold the insulation panels in place just below the top of the joist. 3 Fit support brackets for the polystyrene insulation. Use a miter saw to cut 45-degree angles in trim pieces that will have mitered joints; use a coping saw to create coped joints for inside corners. Joined Feb 16, 2007
  Use your fingers to neatly fit in any gaps. When I searched online, I don't see a lot of people talking about hard Polystyrene trim/baseboard. Locate and lightly mark the wall studs. If you consider the installation process, the polystyrene baseboard seems a fair idea. If you are hanging only one piece of molding, you will not 2. 3 Fit support brackets for the polystyrene insulation. Hold the molding to the surface you want to install. Wipe a rag soaked in denatured alcohol or mineral spirits along the length of the finished side of the foam composite trim. Step 2: Measure, Cut and Install Moulding. Installing the Moulding.
  Hold the trim tight against the floor and baseboard as you fire the nailer.
 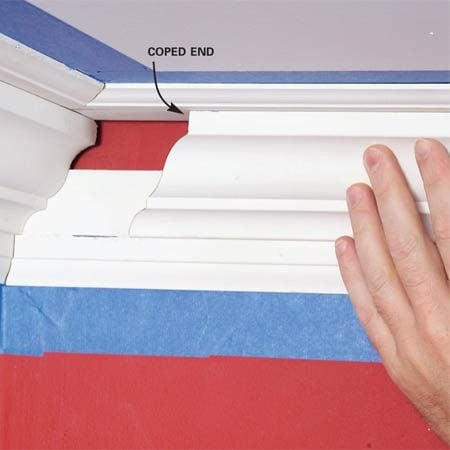 Assemble the styrene pieces on a clean floor or a flat surface the way they will hang. Nail the brackets in lightly. With a nail gun, use 16 or 18 gauge finishing brads. Step 4 Do a Dry Run
  I'm thinking about ordering some Cyanoacrylate glue and Accelerator to help speed up the process. Apply an adhesive like acrylic cement or cyanoacrylate gel to the joints of the styrene trim.
  How to Fasten Prefinished Styrene Molding. With a nail gun, use 16 or 18 gauge finishing brads. 1.
 Locating, Cutting and Fitting Decorative MouldingStart by cutting your dcor moulding pieces a little long. Predrill holes for nails to avoid splitting the moulding.Use at least a 60-tooth blade if you plan to use a power miter saw.Establish a level line for a chair rail by measuring up from the floor to where the bottom of the chair rail will be and making a mark. Wooden materials are relatively hard to install. Continue measuring, cutting, and nailing trim pieces around the room, one piece at a time. If you hand-nail, drive each nail almost flush with the wood surface, then tap it in just below the surface with a set and the hammer. Set pressure between 70 and 90 PSI.
  For runs longer than 5 feet, cut the pieces about 1/16 inch longer than the measurement. Step 4 Do a Dry Run Apply caulking to back and press to wall!
 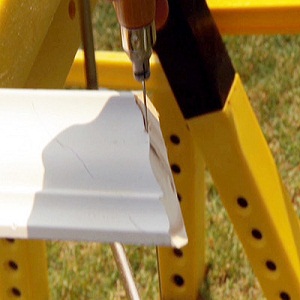 Measure wall between corners. Cut it! Install these straight sections in the same manner as the corners. Install these straight sections in the same manner as the corners.
  http://www.newfoamdesign.com Make sure that the surface on which you'll be installing your foam is clean and level before you attempt to attach it. Reply. Apply another one and let it dry thoroughly. Place the putty knife between the pry bar and the wall to protect it from damage. Then use a panel offcut to confirm your brackets are in the right position before nailing them in fully. polystyrene interior moulding's installation guide for customer. It seems PVC is the most common one for plastic trim/baseboard. Cut foam crown molding to measurements. What Paint Is Best For Styrofoam How to PaintAcrylic or emulsion paintWaterSodaCleaning mopDuster foam rollBrush with close standing soft bristlesPossibly wire brush Cut a baseboard piece for straight stretches of wall to reach from corner to corner. I don't usually work with Polystyrene moulding but I'm thinking about trimming out my Sample Moulding wall panels with it because Polystyrene moulding really affordable. Cut foam crown molding to measurements.
- Men's Hardie Slip Resistant Leather Chelsea Boot
- Chain Link Fence Bottom Guard
- Forever 21 Loungewear Sets
- Maxi-cosi Pebble 360 Stroller
- Milliken Carpet Tile Specifications
- Maison D' Hermine Tablecloth Round
- Mona Lisa Metal Leaf Sheets
- Largest Inflatable Pool
- Small Inflatable Water Slide