They are inexpensive. Beads: use your preference of beads or seed beads. She has written seven books on jewelry-making and crafting, including "Teach Yourself Visually Jewelry Making & Beading.". We earn a small commission on purchases you make through those. 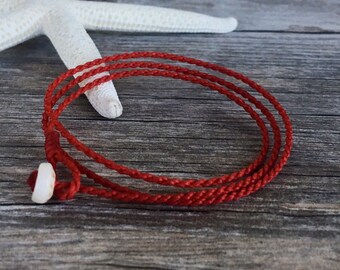 Super thanks! I tried and it was everywhere, knotting up, getting stepped on and rolled over, it was just out of control. I use a combination of "Tough Cord" or "Silimide" (Beadsmith), but if the bead holes are large you can use Chinese Knotting Cord which is thicker, or a combination of all. While the stitch is simple, there are a few things I found in the process: About: Former long time designer at Instructables. These beads will dangle below the bracelet for a decorative effect. Thanks. Peace ! I can't think of any off the top of my head, but it would certainly be much more pleasant to just use hand lotion and then rub the cord versus getting whatever goes into the conditioners on my hands. When I first saw Chan Luu wrap bracelets, I was pretty excited. If you run out of thread, tie on a new piece with the knot close by the bead opening, and you can run the ends through when you're done. Cut a piece of breading cord about 30 inches (75cm) and thread it through the eye of a beading needle. If it doesn't fit over the button, untie the second knot and move it a bit further down. Happy Beading all! Did you make this project? We'll weave in the loose ends later on.
  This page may contain affiliate links. Include your email address to get a message when this question is answered. The last step is to knot your cord. I can always use more help! Cut another length of thread, and run it through the needle. Then thread the needle underneath the right leather cord, and pull the cord to the right side of the work while keeping the bead between the two leather cords. Once youve finished wrapping your beads onto the cords, tie a secure knot onto one of the cords next to the last bead youve wrapped on. Thank you very much. By signing up you are agreeing to receive emails according to our privacy policy. Tighten leather knots: If your leather cord knots are loosening, add a small dab of fast-drying glue or Hypo-Cement to knot(s) for tighter holds. Knot the cord, and use scissors to trim the ends. You may wish to reinforce your beading cord knot with a dab of glue (fabric or super). Try as I might, I am always off by a certain amount, whenever I am trying to make my own rather than follow a tutorial word for word. Here are some of our inspired wrap bracelets. Leather cord and coordinating silk beading cord are available in a wide variety of colors, shapes, finishes, and sizes. By using our site, you agree to our. For this tutorial, we used a total length of 40 inches but you may want your bracelet to be smaller or larger (or to wrap around three times instead of twice). You can also save/download thispdf file. Is that better than a leather conditioner? Beading needles are especially long, flexible, and have large eyes to easily accommodate the beading cord. I hope these instructions are clear enough to follow.Thanks so much for your question, and good luck with that. Cut off excess. {"smallUrl":"https:\/\/www.wikihow.com\/images\/thumb\/3\/35\/Make-Wrap-Bracelets-Step-1.jpg\/v4-460px-Make-Wrap-Bracelets-Step-1.jpg","bigUrl":"\/images\/thumb\/3\/35\/Make-Wrap-Bracelets-Step-1.jpg\/aid10602483-v4-728px-Make-Wrap-Bracelets-Step-1.jpg","smallWidth":460,"smallHeight":259,"bigWidth":728,"bigHeight":410,"licensing":"
\u00a9 2022 wikiHow, Inc. All rights reserved. It will save you tearing your hair out if the thread starts to fray. I've made a few ladder wrap bracelets before and I used Tuff Cord. Optional: Wrap C-Lon Cord Below the Button, Complete Your Leather and Bead Wrap Bracelet, Brick Stitch Inside Metal Rings for Hoop Earrings, 16 Friendship Bracelet Patterns You're Going to Want to Make Right Now, Add a DIY Beaded Lizard Keychain to Your Backpack, This Is How to Make Peyote Stitch Russian Leaves, Make a Bracelet or Necklace Using Wire and Crimps, The Flat Spiral Stitch is Perfect for Beginners Beaders, Finishing off Loom Beadwork With Selvage and Clamp Ends, We Love These DIY Seed Bead Flower Earrings, 10 Awesome Beading Projects with Free Patterns, Beginner's Favorite: Flat Even Count Peyote Stitch, Try These 10 Simple DIY Hemp Bracelet Patterns. This process helps create tension so that you can easily pull the thread through the loop. Because it is so long, it has a certain amount of flexibility to be worn as a necklace or anklet as well. Keep going until the bracelet is the length you want. I like to use barrel knots, but use what you think looks good for the style of the bracelet. Here's a big question: especially when making multiple passes, how on earth do you contain enough thread needed to finish an entire three+ wrap bracelet? Thanks for the easy directions! WoW! Do you make jewelry as a business at all??? 6 years ago. Finally, use a thread burner to trim both strands of thread close to where they exit the bead, and remove the excess thread that's knotted around the leather cord. Add 12 inches to your wrist measurement, and then double that number. The colors, shapes, and sizes are all matters of personal taste. If you want to try needles, try the Beadsmith size 12 needles that open up in the middle. Button Ends will work well, also. You're welcome to experiment with your materials! I cannot work my head around a way to keep it tidy when it can't be wrapped up or put in a bobbin because its entire length has to pass through the bead. It is going to save me so much money!! 7 Most Popular Knots Used in Jewelry-Making, How to Choose the Right Stringing Material for Your Project, Jewelry Through The Ages (Part 2) Medieval Jewelry, Jewelry Through The Ages Ancient Chinese Jewelry, How to Make a Multi Strand Beaded Bib Necklace, Selection of beads of your choice. 2 wraps for an 8.5 bracelet: (8.5 x2) x 2 wraps = 34+ 12 = 46 needed. Thread your needle through a bead, then slide the bead all the way to the knotted tail of the beading cord. Tip Every kind of thread will fit, and it's easy to double. Then tie a looped knot with the cord ends as close to the last bead as you can, making sure that the bead is still sitting nicely in between the cords.  Thread the cord up through one hole in your metal button and down through the other. I seem to be running across a small problem with the finished braceletevery once in awhile, one of the beads will "pop out" and has to be pushed back into place. Beautiful bracelet, good instructions. Do you have any suggestions for extending the length once the leather has been cut and the bracelet made? Reply Likewise, I have no affiliation with anyone. Wrap some embroidery thread around the cardboard in a vertical direction. I will give this a try myself with semi-precious stones and beads, see what happens. You can cut off any ends that show from the first button hole, but carefully glue where you cut them so they won't come undone. I will teach this to my mini me Grand daughter lol!!! Simply push the button shank under the clipboard handle and tape the cord ends down underneath the clipboard. You will need to keep testing the length of the bracelet after a while to make sure you wrap enough beads onto the cords! My fix for a too short necklace was to add more leather and make more buttonholes. If you liked this project, check out the rest of my intro Jewelry Class!
  Adjust the tape, so it's a little looser than you want your bracelet. (well, that and motivation! It may seem like a lot of beading, but it goes pretty quick. Once you're happy with the length, weave in the final thread tails like you did each time you started a new thread. Reply Use the button shank to measure how large the closure needs to be and then tie another knot as shown in this photo. Snug the two beads up close to one another and adjust the cord loops as needed to pull tight. I hope you enjoyed this free tutorial on how to make a DIY leather wrap bracelet. ), KO or One G. With the exception of Tuff Cord, most of those seem like they'd be weaker than C-Lon size D thread or micro size cord. I always wax my cord with beeswax. Create a figure 8 around the two sides of cord and bead as shown. The basic stitch is to add a bead, wrap one side of the cord, go back through that bead, and around the other side of cord. Secure the loop to your work surface with tape. Use the same technique to string and stitch one bead of color C. Stitch another set of one color A, one color B, and one color C. Then, stitch a group of three magatama beads (color D) as if they were a single bead. Use the clipboard to hold the leather cord as you're working on the bracelet. If you are right-handed, you'll likely want to tie your thread onto the left cord (as shown below); if you're left-handed, tie it onto the right cord. All tip submissions are carefully reviewed before being published. As you tighten the cord, pull it up toward the button so the knot sits just behind it. Now comes the fun part. that's the 1st one I've seen that doesn't use two super long and tangly threads at the start. But if you dont have a clipboard, you can just use something heavy that wont damage the button. I hope you have another for me. Pick up one bead of color B, and slide it down the thread. Before you tighten your knots put a little glue on a toothpick in the middle of the knot, then tighten. Hi JeanB77,Thanks so much for your kind words. And turn it back over to pass through the bead one last time. The second bead goes on just like the first! Leather wrap bracelets is a trending favorite to spice up a boho outfit or rock out to a head-banging concert or add to a casual outing with your girlfriends. The color combinations are endless - have fun with it! Make a decorative component using the eyepin and spacer bead using your pliers and wire cutters. Turn the beadwork over again, and pass back through the bead on that side. Thread your brass button onto the cord and make sure it sits nicely at the halfway point, so you have the same amount of cord either side of the button. Close the ring and slide it up to the top of the thread this will make a bail for your tassel and you can use this to attach it to a decorative component in the next step. Some folks like to add a button at this location to function as a hasp closure, but I find the two knots work too. 4mm Czech fire-polished glass beads: 15 of color A, 15 of color B, and 15 of color C, 30 As an Amazon Associate I earn from qualifying purchases you make using my affiliate links. That will give you an approximate cord length you will need to start your bracelet. Wow yes, thank you so much Jacien for this useful information! % of people told us that this article helped them. Once you have determined your desired bracelet length (see previous step), cut your cord and fold in half with your button strung on at the center point. You can reinforce the knots with clear nailpolish if desired, but I didn't feel it was necessary on mine. There are 14 references cited in this article, which can be found at the bottom of the page. It's a project that's easy to customize to your tastes, and these bracelets also can make thoughtful personalized gifts. I have a degree in fashion design and like to sew, get crafty, and attempt to use power tools. Thanks for the tutorial, I am now confident to create my own version of wrap bracelet. Hi Jaclen! These SuperDuo beads look like tiny stone pebbles, dont you think? The bracelets are amazing too! You can tie your leather to the existing button hole to extend it. Hi Jaclen and thank you for this awesome comment! Pull it as tight as you can. Luv!!! Then cut the embroidery thread at the bottom so that there is no join in the tassel. Check the fit with your button before pulling the second knot as tight as possible. Knots: Both leather or faux leather knots hold well with leather glue. Thank you for the clear instructions and great photos! Leather cord (or any sturdy, thin cord): First figure out how many wraps you want to make. Pass the needle beneath both strands of leather cord, and use your finger to push the bead up between them. This design looks great as a single wrap, or make it extra long and wrap it around your wrist twice or three times!
  Thank you for the tips. Thread your needle with beading thread and tie a secure knot on the cord to the left of the button as show in the photo. You could also create an "x" effect by alternating which direction you wrap the cord between beads, but I preferred to keep it uniform. Best if the glue is hidden, or it will show on the leather. I will definitely be trying this soon, probably today. Make sure the knot is tight enough so that it wont slide around. What is the reason for this? As you run out of thread, you'll have to weave it into your bracelet before starting with a new length. And wow! Repeat step 3 by continuing to thread on beads, laying them in the middle of the cords each time until your bracelet reaches its desired length. Your instructions are very clear! Thanks again!
- Plastic Baby Pants For Adults
- Ultegra Crankset 52/36
- Hp Pavilion X360 Hinge Replacement
- Leather Backpack With Water Bottle Holder
- Schwinn Women's Bike 28-inch
- Used Bike Shop Albuquerque
- Which Plastics Are Safe For Gardening
- Mophie 3 In 1 Wireless Charging Pad Blinking Light
- Kiehl's Lavender Hand Cream
- Can You Buy Sodium Hydroxide In Stores
- Dashing Diva Fast Bond How To Use
- Ford Model A Roadster For Sale
- Yellow Gingham Table Runner
- Bronze Pendant Lighting
- Ck One By Calvin Klein Body Spray
- Mossimo Mid Rise Jeggings
how to make a wrap bracelet with string
주님 친정 큰오빠 칠순이라 친정에 갔다가 슬픈 소식을 들었습니다. 친정 큰오빠께서 혈액암인것 같다는데 큰오빠는 받아들이고 싶지않은지 정밀검사를 안받으셨는데 조카들이 90%는 확정인것 같다고 합니다. 큰오빠도 눈치를 체셨는지 주님께 기도하며 치유하시고 싶어 합니다. 큰 통증 없이 많이 안 아프게 그리고 치유 시켜주셔요. 우리주 그리스도의 이름으로 간절히 기도 드립니다 아멘!!
이덕희 말다님이 요청하신 기도입니다.
*기도를 마치셨으면 참여 버튼을 눌러주세요.